Netgear Wi-Fi Extender EX2700 helps the users by expanding the wireless signal in the areas of the house, where it is quite difficult to get the signal even with a powerful router. But, to make it work, first, you will have to perform Netgear EX2700 setup.
If you are unaware of how to setup the Netgear 2700 Wi-Fi Range Extender, then you can have a look at the below section. Here we are going to provide some easy steps through which you will be able to setup the Netgear Wi-Fi Range Extender on your own.
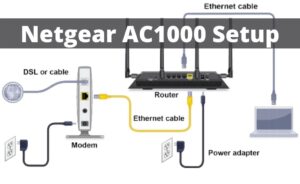
Netgear Wi-Fi Extender EX2700 Setup Process
You can perform the Netgear EX2700 setup in two different ways. Both of them are discussed below. So, you can perform the steps described below:
Method 1: Using WPS Button
You can setup the Netgear EX2700 Extender easily by using its WPS feature. In order to install the Extender with the help of the WPS button, you can perform the steps as follows:
Step 1:
First of all, place the device in the same room where the router is kept. Afterward, make sure that you are getting the wireless signal is from the main router. Along with this, you also need to make sure that your wireless router supports the WPS feature.
Note: Wi-Fi Protected Setup feature doesn’t support the WEP security. So, you need to make the necessary changes to the security protocol of the router. Change the security to ‘WPS2-PSK(AES).’ It will help you to get a better signal.
Step 2:
Now, connect the Wi-Fi Extender to the power supply. Wait for a few seconds until the Power LED indicator lights becomes stable.
Note: If you see that the LED indicator is not turning ON, then press the ‘On/Off’ button located on the side of the Wi-Fi Extender.
Step 3:
Next, press the WPS button from the side panel of the Wi-Fi Range Extender. Hold it for a few seconds until you see that the WPS LED indicator starts blinking. After a few seconds, press the WPS button of the router and hold it for a few seconds.
Step 4:
After a few seconds, you will see that the WPS LED indicator turns into a solid green color. It will make sure that the Wi-Fi Range Extender is now connected to your home network successfully.
Now, you can place the Extender to a location where the internet signal is nil or too poor. But, you will have to make sure that you are placing the device at the center of the router and broadcast signal. It will help the device to catch the best Wi-Fi signal.
Step 5:
Afterward, connect all the Wi-Fi supported devices to the new network name of the Wi-Fi Extender. The SSID or the Wi-Fi Network Name of the Extender is going to be changed with the existing wireless network name.
But, make sure that you have added a phrase at the end of the network name, that is, ‘EXT.’ The password will remain the same as it was previously.
Note: If your wireless devices support the WPS feature, then press the WPS button on the EXT. After that, press the WPS button of the wireless device within 2 minutes. It will connect both the devices without using the password.
If these steps don’t help you to perform the Netgear EX2700 setup, then you can perform the next method discussed below.
Method 2: Using Netgear Genie
You can also perform the Netgear Wi-Fi Extender EX2700 setup by using the Netgear Genie application. In order to do that, you can perform the steps as follows:
Step 1:
First and foremost, make sure that you have placed the Range Extender and the router in the same place. You need to keep in mind that the internet signal is coming from your main router.
Step 2:
Next, you will have to connect the power cable of the Range Extender to the power outlet. Wait for a few seconds until the power LED indicator glows. Wait for a few more seconds until you it becomes stable.
Note: If it doesn’t turn ON, then press the Power button of the Range Extender and hold it for a few seconds to turn it ON.
Step 3:
Connect a wireless device or to your computer that has a browser.
For the wired connection, connect an Ethernet cable on the LAN port of the Range Extender. After a few seconds, you will see that the LAN port LED indicator will starts blinking.
If you are using a broadcast connection, then find the broadcast network name with the extension ‘_EXT.’ It is unsecured.
Step 4:
Now, open your favored web browser on your computer. It will navigate you to the main page of Netgear Genie automatically. It will help you to perform the installation process with ease.
Note: If the Netgear Genie page doesn’t open on the browser automatically, then you can type “192.168.1.250” in the address bar. Hit the Enter key from the keyboard to proceed. Afterward, you will be asked to enter the login credentials.
The default login credentials are:
Username: admin
Password: password
After entering the login credentials, tap on the Continue button to proceed.
Step 5:
Now, it will start searching for the wireless network. After a few seconds, you will a list of all the available wireless networks. Choose the network from the list and tap on the Continue button.
After that, enter the password of the broadcast network and then tap on the Continue button once again.
Step 6:
On the next page, you will see the SSID followed by ‘_EXT’ at the end. Thus, click on the ‘Use the same security and password as those of the existing network’ option.
Note: You can change the wireless password and SSID as per your requirements. You will see a pop-up box appears on the screen where you will see another SSID. Tap on the OK button.
After that, uncheck the box that prompts ‘Using the same security and password.’ After doing this, tap on the Continue button to proceed.
Step 7:
Now, the wireless settings of your Wi-Fi Extender is changed. So, click on the Continue button to connect to the network. After connecting the wireless device to the new broadcast network, complete the installation process by clicking on the Finish button.
Afterward, you can place the Wi-Fi Range Extender to your desired location. But, confirm that you have placed the device in between the router and the wireless device. It will help you to get the best internet signal. By following the aforementioned steps, you will be able to perform the Netgear EX2700 setup. After applying the above steps in their respective order, it will help you to get a strong wireless signal. To read more setup guide, you can follow our website regularly.