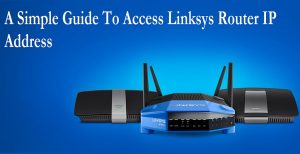
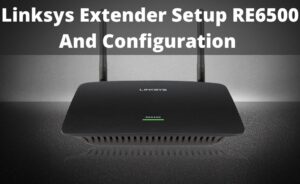
The Linksys RE4100W is a dual-band wireless range extender having 2.4 GHz and 5 GHz band. Therefore, users will be able to get high speed, however, less coverage on 5 GHz band and vice-versa on 2.4 GHz band. This device offers Mu-MIMO technology along with the gigabit Ethernet ports
In order to boost up your existing wireless signal with Linksys RE4100W extender, you must set it up properly. The setup process of Linksys devices is quite simple and reliable. Hence, you just require to follow a few basic measures and then the setup wizard will guide you throughout the Linksys RE4100W setup process.
Learn How to Setup Linksys RE4100W
Here are the basic instructions that should be followed in order to execute the entire Linksys extender setup RE4100W. Hence, let’s begin the setup!
Step 1:
Initially, you need to connect your device to the power outlet. Afterward, keep the device in such a place where your router signal is low or end. Review whether the LED light starts to blink amber. Make sure you place the extender near enough the router device. When you notice that the LED light becomes solid green, you can proceed further with further instruction for setting up the device.
Step 2:
In the next step, you have to choose the type of setup. Therefore, you will be asked with two options” “Wired” or “Wireless”. If the case of the Wired Connection, take an Ethernet cable in order to connect your laptop or computer to the extender. Here, you need to be sure that your computer is not connected to your router while connected to the extender.
Step 3:
However, in the case of the Wireless Connection, try to connect your machine to the extender’s wireless connection. After establishing the connection properly, you can proceed with the next step.
Step 4:
Initiate the default web browser and visit the official web site of the Linksys in order to invoke the Linksys RE41000W web-based setup page. Enter the login credentials such as default Username and Security Key inside the text boxes when you are prompted to do so. Thereafter, hit the “Log In” button in order to proceed further. Keep in mind, the default Username and Security key for the Linksys RE4100W extender is “admin”.
Step 5:
After performing all the above-discussed instructions, you will be redirected to the Configuration page of the Linksys device. Now, try to set the configuration as per your system requirement. Once you are done, proceed to tap on the “Apply” button as well as the “Save” button in order to implement the newly made modifications.
Once done, your extender is properly configured and you will be able to connect your device to the extender network.
Troubleshooting While Setting Up the Linksys RE4100W
There can be different scenarios that can disrupt the Linksys extender setup process. Therefore, try to determine and resolve them on your own.
Scenario 1: Unable to connect to the Router
A majority of users have reported that when they are about to connect Linksys RE4100W extender to their router, connection not found messages show on the display screen. This message clearly indicates that the extender is not connected to the router.
If this situation also takes place in your case and the LCD light keeps blinking amber light, then you might need to place the extender closer to the router.
Moreover, try to avoid keeping the extender near the reflective surface, metal object and other electronics elements like the oven in order to prevent signal interference.
On the other hand, if you are using wireless connections, then try to go for the wired connection. Actually, the wired connection is less prone to connectivity problems.
Scenario 2: Intermittent Connectivity
While setting up the Linksys extender setup, if you notice intermittent connectivity, then either the device is at the edge of the router’s coverage area or is out of the coverage area of the router’s range. To get out of the situation, follow these instructions.
- Be sure that the Linksys device is receiving at least a 50% signal of the router.
- Moreover, make an attempt to review the location of the device, this must be equidistant from the router and also in the no wireless connection zone of your premises.
Scenario 3: Not Able to Access the Linksys Setup Portal
If you are not able to access the Linksys setup portal, then you have to carry out the underlying instructions.
- Primarily, make an attempt to power cycle the range of the Linksys router.
- Try to move it such area that is close enough to your router
- You can utilize the IP address of the device as the Web address of the portal.
- If none of the above instructions works, then resetting the device can be a wise decision.
Frequently Asked Questions:
-
Why is my Linksys Extender Blinking Orange?
The Linksys extender has an LCD light that is situated on the front of the device, This light indicates that the device is powered on. But, if the light shows an orange signal, then it straightforwardly defines that device firmware is malfunctioning.
-
How do I Know if Linksys Range Extender Stops Working?
Initiate a web browser and head over to the web-based setup page of the extender. Note- The default IP address of the Linksys extender is 192.168. If you do not configure the extender yet, then you can use the default IP address. Go to the Status section that is present in the left pane of the screen. From the appeared menu, hit the option titled “Device Info” and initiate the “Network Address”. Check for the Subnet Mask and Default Gateway in order to verify whether the Linksys extender is working or not.
-
Where is the WPS Button is Located on a Router?
On a router, a WPS button is either located at the back or in the front of the device. But, all wireless routers do not have the WPS button. Further, try to check the router manual in order to get all the necessary details regarding the “WPS” feature.


