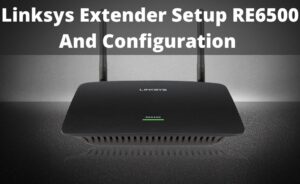
Linksys RE6400 is a WiFi extender. If you have a Linksys RE6400 Extender, it will help you to extend the signal of your WiFi to every corner of your house or office where you have installed. However, if you have not yet installed it, then here are the steps to set it up.
Procedure to setup Linksys RE6400
The procedure to set up Linksys RE6400 is very easy. Here is the step by step procedure to set up the Linksys WiFi extender.
1. Set up the WiFi and Linksys RE6400 connection
You have to establish the connection between your WiFi and the Linksys device in order to use it.
- Make sure that there is an internet connection on your router. You can connect the devices by using WPS. It is very to connect using this over the WiFi. Now, take the extender and plug it to the nearby power source. After that, you will see that the green light at the front of the extender is blinking. This blinking will occur for 1 minute.
- You have to wait until the green light turns into amber.
- Now, you have to extend your network of 2.4 GHz. For this, you have to press the WPS button located on both the extender and the router. After that, you have to wait until you see the green light. If you see that the light is green, it indicates that the connection is stable. However, if you see amber light, then the connection is not successful.
- After that, you have to extend the 5 GHz network also. The process is similar to extending the 2.4 GHz network. Press the WPS button on both the devices and wait for the light. If you see the green light, then the connection is stable and if the light is amber, the connection is not stable.
- Next, unplug the extender and place it between the dead space of your place and the router. You can check the signal strength of this place by using your laptops or mobile phones. If the signal strength is less than 50%, then you need to move the extender closer to the router.
- The router can take a few minutes to boot up after you move it. Wait till the LED light starts blinking. When the light will be turn green, it will indicate that the connection is successful.
- Now, you will be able to connect your devices to your WiFi network from the dead spaces of your place.
Now you have successfully done the Linksys extender setup RE6400 for your place.
2. Set by using the browser
You can also use the browser to set up the Linksys RE6400. Here are the steps for the setup:-
- Place the WiFi extender in between the dead zone and your router and plug it in a nearby power source. You can use your laptop or mobile phone to check the signal strength of the area. If the signal strength below 50%, you need to move the WiFi extender closer to the router.
- After determining the correct place, turn off the WiFi extender and wait until you see the LED light has turned amber.
- Then, connect your device to the “linksysextendersetup-XXX” link. Here, The “XXX” represents your extender’s mac address. You can use any device, like a tablet, mobile or computer to connect with your extender.
- After that, type in the “192.168.1.1” and then follow the instructions on the screen.
3. Opening the setting interface
One of the important parts of the Linksys RE6400 setup is to access the settings. It will help you to view or change the settings. For that, you have to connect to the network of your WiFi network. Then, open the browser on your device and in the address bar, type “extender.linksys.com”. Here, you have to enter your ID and your password. If you have not changed the default login credentials, then you can get the ID and the password by entering the settings of your main routers. However, if you have changed the ID and password, you can use them to log in.
You can also use the IP address of the router to access the settings. The IP address will be located at the back of the router.
4. Connecting to the device by using the device pin
Go to the setup of the WiFi and then enter the pin of the device in the correct field. Then, fill up all the other required fields. After you have filled up the required fields, click on the register button. Then, the green light will turn on for about 10 seconds.
After that, when the screen will prompt you to press the OK button. You must press the OK button within 2 minutes after the prompt appears, otherwise, you have to do this procedure all over again. However, make sure that your device support WPS. This procedure does not work on the device without WPS service.
5. Connect your device by using the extender’s pin
You can also use the pin of the extender to connect your device. Just as the previous method, you have to enter the pin of the extender on the required field and fill up all the other fields. Then, as you will see the prompt to press the OK button, you have to press it. If you do not press the button within 2 minutes, you have to do this procedure form the start.
6. Site survey
One of the distinctive features of the extender is the site survey. This will give you the idea about all the working network and the access points near the extender’s range. For this, you have to log in to the extender and access the settings. This procedure has been discussed above.
After logging in, you have to go to the tab of “Wireless”. Here, you have to locate the option of a site survey. Within this option, you will see a table that has four headings. These headings are select, SSID, GHz, signal strength and security. Go to the select column and click on the button. After that, select the option of “Connect”. You have to click the connect option for both the bandwidth.
The column of GHz will tell you about the bandwidth of all the networks present in your neighborhood. The security column will inform you about the status of protection for all the networks.
Now, you have successfully completed the Linksys RE6400 setup and now you also know the features that will help you to secure your connection. These are very simple steps and you will have no problem in following them. So, use these methods and set up your Linksys WiFi extender today.


