Belkin produces excellent routers which are sturdy and has long durability. If you have bought a Belkin Router recently then follow this guide studiously because RouterGuide is going to share some neat ways to set up the router. Along the way, I will also provide the steps to access the Belkin Router login page. Do not worry, this guide is easy to understand and does not require any technical knowledge. So without wasting any time, let us go through the guide step by step.
How to Access Belkin Router Login Page?
Here you are going to know about how to access the login page and much more. But before that, let us understand the basics so that you do not get lost in the middle of the guide. Either it is a Belkin Router, or for that matter any model of router, every networking device has a firmware which acts like an Operating System and it is installed on the hardware board of the device.
Through the firmware, the router operates and stores all the network configuration. When you say you want to access the login page, it basically means you are trying to access the firmware settings. So the first step is to go through the login page. It’s important to note that the firmware is independent of the PC and works on its own. Now that you have gone through the basic points, let us move to the steps.
Steps for Belkin Router Login:
- First of all, turn on the Belkin Router and connect to the PC using an Ethernet cable. Keep in mind to connect the wire to the LAN port which has a blue identifier. Now, wait for all the LED indicators to become stable.

- Next, open a browser on your PC. It can be any web browser but few recommendations are Internet Explorer, Google Chrome or Mozilla Firefox for better compatibility. After that, type 192.168.2.1 into the search bar and hit enter. For your information, this is the default IP address of Belkin routers.
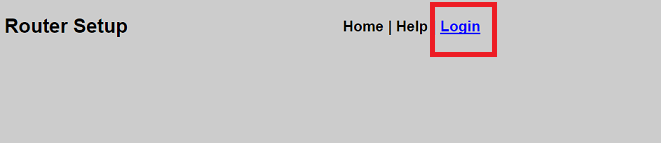
- It will open the Belkin Wireless Router login page and after providing valid credentials, you can access the setup page and modify the network configuration to your preference.
Steps for Belkin Router Setup:
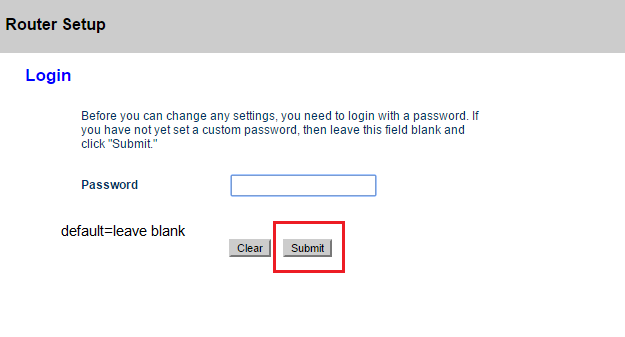
- If you want to manually set up the Belkin Router then follow on. Once you are on the login page, provide the password if you have set any. If not, keep the field blank and click on the Submit button. It will take you to the Setup page without any issue.
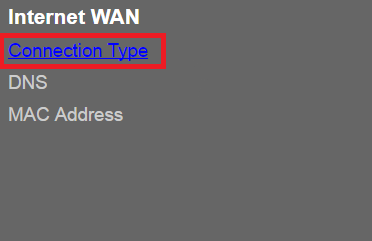
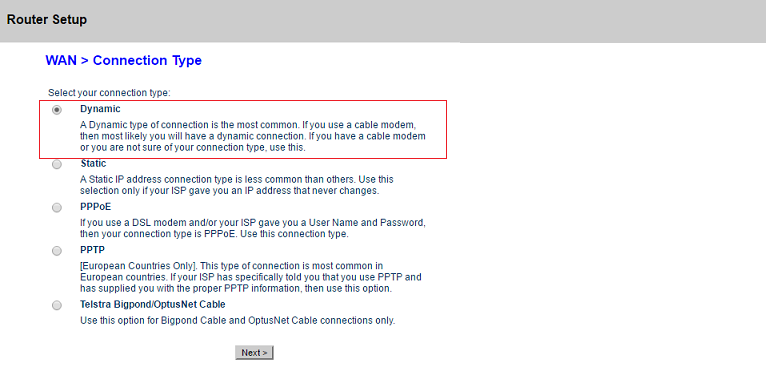
- Once you are through Belkin Wireless Router Login, go to the Internet WAN menu and click on Connection Type. Here, you will get five options: Dynamic, Static, PPPoE, PPTP and OptusNet Cable. The most common type of connection is Dynamic so choose that and click on the Next button. If you are aware of a different connection type then proceed with that instead.
- On the next page, you will be asked to provide network configuration like IP address, Subnet mask, and DNS server. If you do not have these details, then ask your Internet Service Provider(ISP) to provide these settings. After that, click on the Apply Changes button.
- Now, click on Wireless menu in the left pane and select Channel and SSID. Here, enable SSID broadcast and set a name for your WiFi in the SSID field. Click on Apply Change and move to the Security menu just beneath it. Once there, set a strong password for your WiFi and click on Apply Changes.
- Finally, you will see Internet Status turn blue and it will display as Connected on the top corner. Make sure, you have connected the Internet cable to the WAN port of your Belking router. It has a yellow marker to easily identify. Now you have successfully completed the Belkin Router Setup and can enjoy the internet through WiFi and Ethernet.
Solutions to the Belkin Router Common Problems
- During Belkin Router Setup, if you are unable to access the login page through the browser then check the Ethernet cable if it has a loose connection. Once it is connected properly, a stable LED will blink on the router.
- Additionally, check if anyone has disabled the Ethernet port on your system. Open Network and Sharing Center through Control Panel and click on Change Adapter Settings from the left panel. After that, right click on the Ethernet port and enable it. Now the system will detect the router and you can log in without any issue.
- If you are using a modem then connect the router to the modem using an Ethernet cable through the WAN port. If not, then directly connect the internet cable to the WAN port.
- Even after proper connection, if 192.168.2.1 is not leading anywhere then there might be some change in default IP address. To find out the current IP address, open Network and Sharing Center and click on LAN connection. It will pop up a small window. Here, click on the Details tab and look for IPv4 Default Gateway and note down the address. This is your router’s IP address. Open it through the browser and then you can access the Belkin Wireless Router Login page.
- If you are facing any difficulty navigating through the settings then simply open My Computer and switch to the Network tab. There, you will find your router’s listing. Just double click on the icon and it will open the login page through a browser.
Final Words
I have tried to cover as many issues as possible with a simplified guide. I hope the instructions that RouterGuide provided were of help and you could log in and setup Belkin Router without any difficulty. On a side note, you can use this guide to set up any model of Belkin Routers.