The 192.168.1.0.1 helps all the users of routers and modems to access the administrator control panel. It is also known as the router management page or router dashboard. If you are eager to make changes in the router settings, then the private IP address will come in handy.
The private IP address is not accessible to everyone. That is why a few experts say that it is the reserved IP address for all the network devices. Sometimes, if you cannot access the router management page or dashboard, then the troubleshooting procedures are very much necessary.
192.168.1.0.1 — How does it Work?
It’s the type of private IP address that falls under the category of IPv4. If someone tries to access the IP from outside, he/she will not be successful. It is flexible for you to understand being a binary IP address. The range per section within the dots starts from 0 and lasts up to 255.
Login Process via 192.168.1.0.1
Before you begin, you need to set up the router/modem and the computer. In addition to that, you have to decide which process you want to opt for the login. There are basically two types of login processes — wired and wireless. For the wireless connection, you need to connect the router/modem to the computer via Wi-Fi. Regarding the wired connection, you need to avail the Ethernet cable.
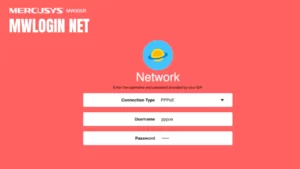
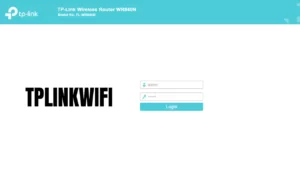
After you have finished the preliminary setup, place the 192.168.1.0.1 in the address bar of your system’s default browser. When the login page opens, check for the login ID and password. Hopefully, you will find it on the manufacturer label. Write down the login ID and password in their respective places and hit on the “Login” button.
Proceed towards the Configuration Process
A lot of functions and tabs will be present on the device’s management page. To know all the features and functions, you need to observe them carefully. Now, navigate to the settings where you need to deal with the network credentials. There are two types of internet connections available — static and dynamic. If you have the network data for configuration, it’s the dynamic connection. When the router automatically syncs with the internet connection, it’s a static connection.
Of course, you will be able to see the desired fields for entering the network data. As the network IP address, DNS, Default gateway and others consist of numbers, you need to be very careful while entering them in their requisite place. After that, set the router/modem security from normal to WPA/WPA2. Now, you have to finish the configuration process by setting a name and a strongly encrypted password.
What if 192.168.1.0.1 doesn’t work?
If you face any problem with the private IP address, you might not be able to access the router management page. So, in such a situation, you must check whether all the router peripherals are intact or not. After that, locate and find out the Reset button. Resetting the router/modem is the only way to resolve any issues regarding the private IP address.
Press and hold the Reset button with the help of a pen or paper clip (straightened). You must hold it for 8 to 10 seconds; after that release it. The process of reset will remove all the errors as well as the configuration data. So, you have to perform the re-configuration procedure once again.
What are the Alternatives of 192.168.1.0.1?
The alternatives of the private IP address are 192.168.1.1, 192.168.1.2, and 192.168.1.3. These addresses also belong to the private category. In addition to that, all of them specifically address the local clients.
A Bunch of Activities with the Private IP address
With the help of 192.168.1.0.1, you can easily manage the home internet connection whenever you want. Furthermore, you can also make the necessary adjustments and configure the LAN, MAC, WAN, WPS, DNS and others.
The Default Username and Passwords (as per routers)
Here are some default usernames and passwords that you must know. There is a high possibility that the router brand that you are using is present here. This information will help you when you accidentally forget the credentials.
- ASUS: admin-admin
- D-Link: admin-” blank”
- Aztech-admin-admin
- CyberTan: “blank”- admin
- CNet: admin-admin
- Dovado: admin-password
- Airlink101: admin-admin
- Billion: admin-admin
- Edimax: admin-1234
- DrayTek: admin-admin
- GlobalScale: root-nosoup4u
- Encore: admin-admin
- EnGenius: admin-admin
- LevelOne: admin-password
- JCG- admin-admin
- Linksys: “blank”- admin
- MSI- admin-admin
- MikroTik: admin- “blank”
- Netgear: admin-password
- Nexxt Solutions: admin-admin
- Open-Mesh: root-0p3nm35h
- OvisLink: admin-airlive
- PRO-NETS: admin-1234
- Proxim: “blank”-public
- Planex: admin-1234
- Rosewill: admin-admin
- Ruckus Wireless: super-sp-admin
- SMC: admin-smcadmin
- Sitecom: admin-admin
- SmartRG: admin-admin
- TOTOLINK: admin-admin
- TP-Link: admin-admin
- TRENDnet: admin-admin
- Tecom: admin-admin
- Ubiquiti Networks: ubnt-ubnt
- Western Digital: admin-password
- Winstars: admin-password
- Corega: root-” blank”
A very important aspect that you must understand is – the above-mentioned passwords, which are mentioned “blank”, indicate that you have to keep the password area blank. Thus, no password is assigned with the ID. Further, type the ID and click on the “login” button to access the router management page.