TP-Link, Tenda, TeleWell use 192.168.0.254 as their router’s default IP address. The extenders of these three network manufacturing organizations also use this IP address for the configuration and synchronization process.
There are also some alternatives to this IP address. And, they are 192.168.1.1, 192.168.0.1, 192.168.2.1 and many more. You need to make use of 192.168.0.254 to log in to your router. After that, the configuration process will occur. Furthermore, accessing the additional features of the router will require an IP address. You will come to know about all of them later on.
How Does 192.168.0.254 Work?
The private IP address is not accessible by anyone except you. So, how does it communicate with the internet? Whenever you try to access a webpage, 192.168.0.254 communicates with all the public IP addresses. On the other hand, it keeps the authentication private. Only the request for accessing a website is delivered to the selected IP. After granting the request from the desired website’s main server, it brings back to the router. Thus, you can access the webpage with ease.
How to Login Via 192.168.0.254?
First, set your router/repeater’s default gateway address to 192.168.0.254 to enter the Admin Console. The router’s rear label lists the default IP address.
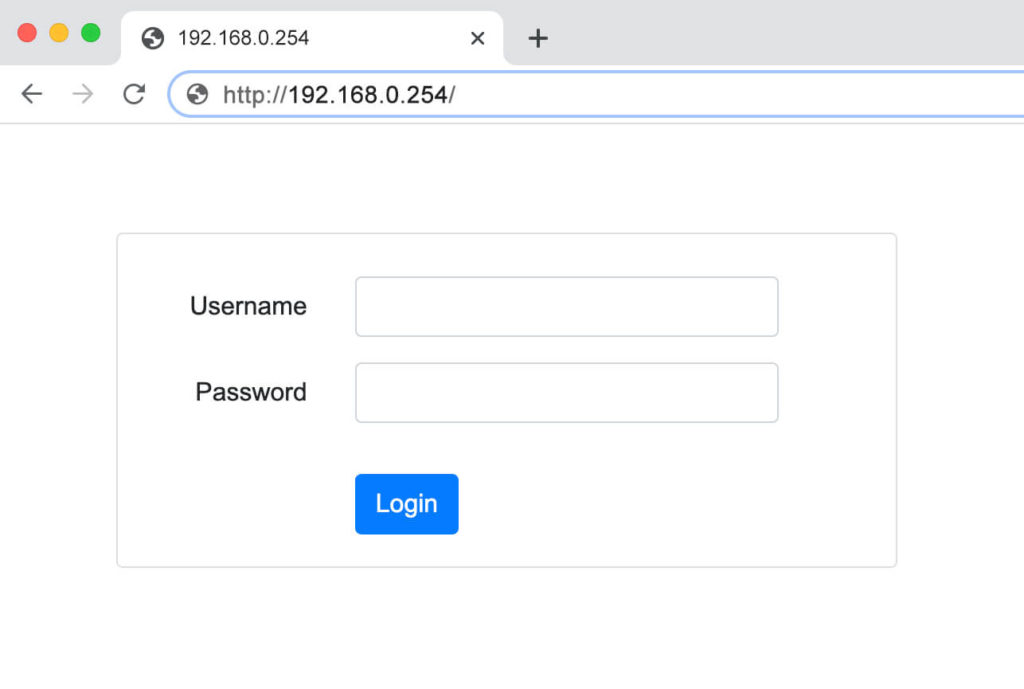
Steps to access the admin panel at 192.168.0.254:
- Launch a PC browser like Google Chrome, Mozilla Firefox, or others.
- Type any of the following address: http://192.168.0.254 or 192.168.0.254 and hit Enter.
- Your wireless router/repeater login page appears. Login using your username and password here. The router’s back label provides the default login username and password.
- Click Log In using your username and password.
- Log in to your wireless router/repeater’s Admin Console. Here, you may make any necessary configuration modifications.
TP-Link
Navigate to the Wireless settings from the router’s management page. In this section, you have to set the SSID and password. Set the auto format in both the channels’ drop-down options. Moreover, you can tick mark on the SSID broadcast and save the changes.
After that, select the Wireless security option to activate the network type and encryption method. Click on the WPA/WPA2 radio button and select WPA2-PSK. The encryption type must be AES. Enter the router password and save the changes. If the firmware of the TP-Link router is the latest, then the network credentials will be synchronised automatically by the device.
Tenda
You must log in via 192.168.0.254 to the Tenda router before accessing the router management page. The first step will be to select the internet connection type. Select PPPoE for dynamic and DHCP for static connections. After that, check the status of the router. In this router, you have to clone the MAC address of the computer. After typing the system’s MAC address, click on Clone MAC address and OK to continue.
The next step will be choosing the WAN speed. Nowadays, every broadband, co-axial, DSL connection is full-duplex. So, select 100MBps Full-duplex and click on OK. Hopefully, you have a WAN ethernet connection, select Wired WAN. In the case of wireless, select Wireless WAN.
Coming to the LAN settings, you have to apply the network IP address and subnet mask. The LAN mac address will be synced automatically. After that, leave the secondary SSID blank. The wireless working mode, network mode must be set to default. You can activate the SSID broadcast so that everyone can see the Wi-Fi router name. Lastly, the AP isolation, channel bandwidth, APSD cable should be in default mode.
TeleWell
And, for the TeleWell router, the configuration process is not much different from the others. As usual, you have to log in with 192.168.0.254. After that, set the SSID and password for the router’s security. Set the connection type and enter all the network credentials. Go through all the on-screen instructions. At last, save the configuration and close the page.
Changing your Wi-Fi Network SSID and Password:
- Find your router’s IP address. This is usually printed on a sticker on the bottom or back of your router. You can also find it by logging into your router’s admin console and looking for the IP address setting.
- Open a web browser and enter your router’s IP address in the address bar. Press Enter.
- Log in to your router’s admin console. You will need to enter the router’s username and password. This information is usually printed on the same sticker as the IP address.
- Once you are logged in, navigate to the wireless settings. This will vary depending on your router model, but it is usually located under a tab such as “Wireless”, “Wi-Fi”, or “WLAN”.
- Look for the SSID field. This is the name of your Wi-Fi network. Enter a new SSID if you want to change it.
- Look for the Wi-Fi password field. Enter a new password if you want to change it.
- Click the Save or Apply button to save your changes.
- Your router may reboot. Once it has rebooted, your Wi-Fi network name and password will have changed. You will need to reconnect to your Wi-Fi network on all of your devices using the new SSID and password.
Tips:
- Choose a strong password for your Wi-Fi network. A strong password is at least 12 characters long and includes a mix of upper and lowercase letters, numbers, and symbols.
- Change your Wi-Fi password regularly, especially if you think someone may have unauthorized access to your network.
- If you have trouble logging into your router’s admin console, or if you can’t find the wireless settings, consult your router’s manual.