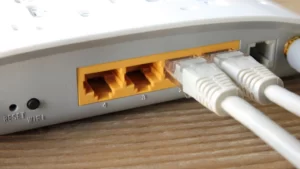
DSL modems require an ethernet cable to connect to the wireless routers. But, most wireless modems can be set up without an ethernet connection. The latest modems don’t have an ethernet port but still can connect to the internet. If the modem has a built-in Wi-Fi router, you don’t need an ethernet cable and setup modem without ethernet.
Suppose you are about to plug in the ethernet cable and find out it’s not working. You can still set up the modem and establish a home network in such situations. Moreover, it is pretty easy to install a new wireless modem in your home/office. However, the steps to set up the device may vary depending on your model.
Want to set up the modem wirelessly? Follow this guide to know how to setup modem without ethernet connection:
Requirements to Set Up a Wireless Modem
Certain factors need to be considered before installing the modem. Ensure the device has updated firmware and is compatible with the router. You also need to check whether the browser is up-to-date. Install the latest version of the web browser before the setup.
Place the dual-band router close to the modem. Disable the router’s security feature to avoid inconveniences. Besides, there should not be any objects between the modem and router. Otherwise, they can create an obstruction and prevent the modem from working.
Additionally, you should turn off the Bluetooth devices. Check whether the ISP has programmed the modem with your account information. Sometimes, you might need the ISP’s help to plug in the modem in the home or office.
However, it can be done without external help by following the above-mentioned instructions:
Easy Steps on How to Setup Modem without Ethernet
Wireless modems are easier to install than wired ones. The old modems use an ethernet cable to connect to the latest home routers. You can’t access the internet when the ethernet cable becomes faulty. However, you don’t have to fret over this issue using any next-generation modem.
Did you recently buy a modem? Then, implement these steps to setup modem without ethernet:
1. Find the Modem Ports
Look for a cable port to connect the modem if you have purchased cable internet service. Did you get the DSL phone internet service? Then, you need to plug the modem into the telephone’s port. Search for an area where you would like to place the modem in the home or office. Keep it near the phone and router to avoid connectivity issues.
2. Connect the Coaxial Cable
Now, it’s time to plug one end of the modem’s coaxial cable into the TV’s wall jack. Plug the other end into the cable model’s coax port. You will hear a clicking sound when connecting this cable. This indicates that the cable is connected properly to the right port.
The coax port is located at the device’s back panel in most cable modems. However, this might vary from one wireless modem to another. Besides, you can’t find this port in the DSL modems. Instead of a coax port, connect the cable to the “Phone” or “Phone in” port.
3. Connect the Modem to the Power Outlet
Find the modem’s power cable and plug it into the wall outlet. Turn on the power switch after a few seconds and wait until the device initiates the startup program. The cable or DSL modem’s power light will blink and turn solid green. This indicates the modem has established a power connection.
Additionally, the “Online” or “Connect” light is blinking green. This status light will turn red when there is no internet connection. Contact the ISP in such situations to restore the internet connection.
Is the “Internet LED” flashing green? This indicates that the modem has established a secure Wi-Fi connection.
4. Connect the Modem to the Router
Once all the modem lights start blinking, you can connect it to the other devices. Moreover, there are several options to connect this device to routers.
Do you use a modem with a built-in wireless router? Then, you don’t need a secondary router to get the internet connection. You can connect these two devices to a wireless network without ethernet cables.
Moreover, the users can connect the modem and router via a network cable. After that, you can connect the Wi-Fi-enabled devices to the router. However, you connect the network cable if the router doesn’t have a WAN port. Get a router with this port to connect it to the modem without LAN cables.
5. Connect the PC to the Modem
It is pretty simple to connect a Windows computer to a wireless modem. Connect one end of the network cable to the PC’s LAN port and the other end to the router’s LAN port. Access the “Start” menu, go to the search bar and write “cmd”. Alternatively, you can hold the Windows and X keys together and select “Command Prompt”.
Enter “ipconfig” when the Command Prompt window appears and press “Enter”. Head to the “Default Gateway” section and check the modem’s IP address. Open a web browser, go to the URL bar and enter the gateway IP. Hit the Enter key to access the modem’s login page.
What else Needs to be Done?
Provide the correct login credentials and tap on “Sign In”. If this is the first time you are login into the modem, then check the administration ID. Enter that in the login page and keep the “password” field blank. Press the “Enter” button and head to the “Wi-Fi” menu. Here, you can find out the Wi-Fi SSID and the password of the modem.
Tap on the PC’s network icon and find the network name from the list. Select “Connect” to connect the Windows laptop or computer to the network. If this is the first time you are setting up the modem, you will be prompted to enter the passkey. Write that when the pop-up window opens and click “Next” to complete the setup.
Modem is not working? Here’s How to Fix it
The modem fails to work due to incorrect setup or configuration. However, you can solve this issue by rebooting the networking device. Disconnect and reconnect the coaxial and network cable. Install the updated firmware for the modem to resolve the problem.


