Changing the DNS settings on an Arris DG1670 router can help in improving the security and privacy of your home network. You can also enjoy some gain in speed by changing the DNS address.
Steps to Change the DNS Settings On An Arris DG1670 Router
To change the DNS settings on an Arris DG1670 router successfully, follow the steps exactly as cited below.
- Go to the Homepage of Arris DG1670 router and then click on “Wireless”.Within the section, click on the LAN setup and then on “Choose LAN Settings”.
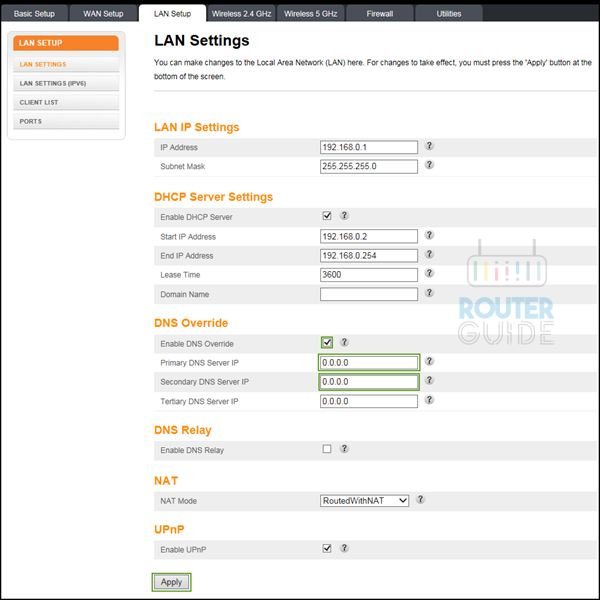
- After that, a page will appear on your screen. Locate the “DNS Override” option at the bottom of the screen.
- Now tick the “Enable DNS Override” so that you can enter your own address. Enter the main DNS server address for use on the Primary DNS Server IP box.
- Now provide the alternate DNS server address (this is to be used when the first one cannot be found)
- To add a third address, go to the box titled Tertiary DNS Server IP, enter the address and then click on Apply.
One thing that needs to be kept in mind is the device might not begin using the new DNS Settings until it is rebooted. Thus, make sure to reboot it and then navigate to the network settings. Check if the DNS server chosen by you is applied in it or not.
Now you should be able to change the DNS settings on an Arris DG1670 router. Please let us know whether the method worked or not.